Video released on 30/08/2024
Tasks are the operational workflows that users complete in the App or Portal. They are built using steps and elements, and once completed, they generate submitted reports.
Key terminology
Before building a Task, it is useful to understand the core terms used in Flow Builder.
| Term | Meaning |
| Procedure | A folder-like structure that contains related Tasks, Training, Guides, and Timeline activity. |
| Task | A workflow that users complete. Completing a Task creates a submitted report. |
| Flow | The configurable workflow structure used to build Tasks, Training, or Guides. |
| Step | A page or stage within a flow. A Task can contain one or many steps. |
| Element | A building block added to a step, such as text, a question, an image, a number field, a dropdown, or a confirmation. |
| Report | The record created when a Task or Training flow is completed and synced. |
| Report Subject | The unit the report is about, such as a line, machine, area, product, SKU, or other configured unit type. |
| Report Title | The title shown for a submitted report. This is usually based on the Task name, but can be customised using selected answers from the flow. |
Who can create or edit Tasks?
Task creation and editing depends on the user’s access.
Users can create or edit Tasks when they have the correct Portal access and either:
-
- are a Collaborator on the specific Procedure, or
have wider access through permissions such as Procedure Admin or System Admin.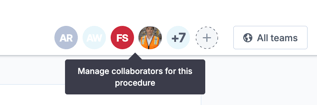

Being a member of a Team assigned to a Procedure does not automatically give a user editing access in the Portal.
Team assignment controls which users can access and complete the Procedure in the App. Collaborator or admin access controls who can build and maintain the Procedure in the Portal.
| Access type | What it allows |
| Collaborator | Can build and maintain content in a specific Procedure. |
| Procedure Admin / System Admin | Can access and manage Procedures more broadly, depending on permission setup. |
| Assigned Team member | Can access the Procedure in the App, but does not automatically have editing access in the Portal. |
Before you start building a Task
Before creating a Task, consider:
-
- What process or activity the Task needs to capture
- Who will complete it
- Whether it should be scheduled or started ad hoc
- Whether it should be linked to a unit, such as a line, machine, area, or SKU
- What information the user needs to see while completing it
- What information needs to be captured in the final report
- Whether any answers should influence the report title
- Whether the Task will need routing, triggers, statuses, or reporting outputs later
A clear structure at the start makes the Task easier to maintain and easier for operators to complete.
Creating a new Task
%204.png?width=670&height=348&name=Task%20Configuration%20and%20flow%20steps%20(1)%204.png)
To create a new Task:
- Open the Procedures area in the Portal.
- Open the relevant Procedure.
- Go to the Tasks page.
- Select Add to create a new Task.
- Give the Task a clear name.
- Configure the Task structure using steps and elements.
- Preview the Task before making it available to users.
Use a clear Task name that describes what the user is completing. For example: Daily Line 4 CIL or Report a Defect
Task names should be easy to understand in the App, in submitted reports, and when reviewing data later.
Task name, Report Subject, and Report Title
These three concepts are related, but they are not the same.
| Concept | What it means | Example |
| Task Name | The name of the workflow the user starts. | Daily CIL Check |
| Report Subject | The unit the completed report is about. | Line 4, Filler 1, SKU 12345 |
| Report Title | The name shown on the submitted report after the Task is completed. | Daily CIL Check - Line 4 |
By default, the report title will usually be based on the Task name. However, report titles can be customised by setting or appending it using selected answers from the flow.
%203.png?width=670&height=338&name=Task%20Configuration%20and%20flow%20steps%20(1)%203.png)
For example, if a user selects a machine or enters a defect type, that answer can be added to the report title to make submitted reports easier to find and review.
This is useful when teams need to search reports by: machine, line, defect type etc.
A well-structured report title helps users quickly understand what the report is about without opening it first.
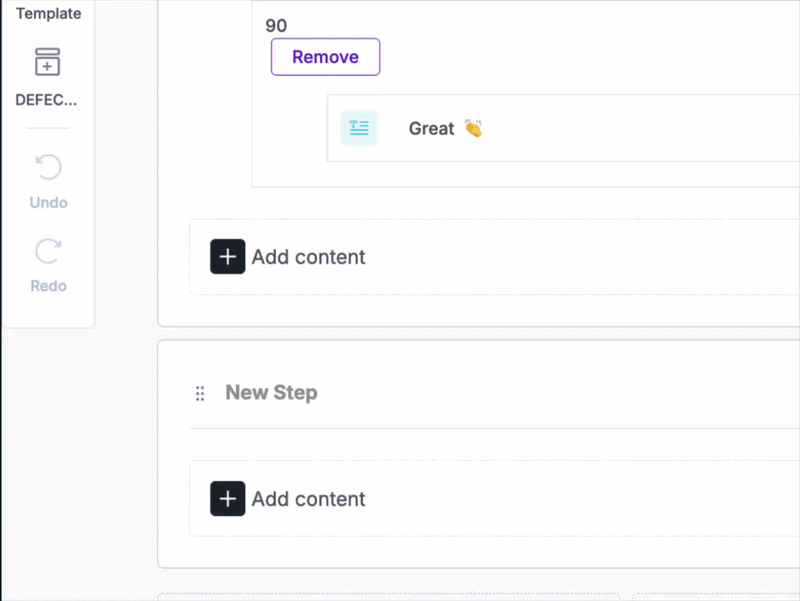
Steps and elements
Each Task is built from steps and elements.
A step is a page or stage in the workflow.
An element is the content added to that step. Elements can be used to display information, collect answers, request media, or guide the user through the process.
Examples of elements include:
Text Content, Text Capture, Number, Date / Time, Yes / No, Dropdown, Multiple Choice, Image, Video, File Upload, Signature, Unit Select, Confirmation
For example, a basic inspection Task might include:
| Step | Example elements |
| Step 1: Select area | Unit Select, Text Content |
| Step 2: Complete checks | Yes / No, Number, Multiple Choice |
| Step 3: Add evidence | Image Capture, Text Capture |
| Step 4: Confirm completion | Confirmation, Signature |
When building a Task, give each step a clear title.
Step titles help users understand where they are in the workflow and what they need to complete.
Adding elements to a step
To add elements to a Task:
- Open the Task in Flow Builder.
- Select the step you want to edit.
- Add the relevant element type.
- Configure the element settings.
- Add clear instructions or answer options.
- Preview the Task to check the user experience.
When choosing elements, think about the type of information you need to capture.
| If you need to... | Use the element... |
| Show instructions or guidance | Text Content |
| Capture a written response | Text Capture |
| Capture a measurement or value | Number |
| Ask a Yes / No question | Yes / No |
| Ask users to choose from options | Dropdown or Multiple Choice |
| Ask users to select a line, machine, SKU, or other unit | Unit Select |
| Capture evidence | Image, Video, or File Upload |
| Require sign-off | Signature or Confirmation |
A good Task should be simple, clear, and practical for the shop floor. The goal is to guide users through the work without creating unnecessary friction.
Translating Tasks, Training, and Guides
Where teams work across multiple languages, Tasks, Training, and Guides can be translated.
This helps teams use content in their preferred language and supports more consistent execution across sites, regions, and shifts.
%205.gif?width=559&height=419&name=Task%20Configuration%20and%20flow%20steps%20(1)%205.gif)
Translation is especially useful when:
-
- a flow was originally built in a different language
- multiple sites use the same standard process
- operators need local language support
- global content is being deployed across regions
After translating content, it is good practice to preview and review the flow to ensure wording, labels, and instructions still make sense in context.
Previewing your Task
Before making a Task available to users, use Preview to check the flow.
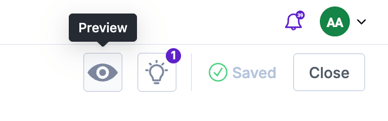
Preview helps confirm:
-
- the Task opens correctly
- step titles are clear
- instructions make sense
- elements appear in the right order
- required fields behave as expected
- report title logic is working as intended
- the user experience is clear and easy to follow
If possible, test the Task in the App with a small test Team before assigning it to live operational Teams.