Video released on 21/06/2024
Zaptic Teams
The Teams tab is the place to view and manage your users and teams in Zaptic. Here you can:
- Invite/Deactivate a user in Zaptic
- Re-send a lost invitation
- Import users in bulk via a CSV
- Update or grant user permissions
- Update or grant user teams
- Manage team members, team admins and training admins
- Create, update and maintain Teams
Terminology:
User - An individual account in Zaptic with a login to access the system and complete work.
Team - A group of users. A common way to group a team is based on role e.g. Operators or Leadership. Assigning teams to procedures is how content is made visible in the app.
Team Admin - A user that can add/remove people from a team. A team admin is only possible when the "User Management" permission is turned on.
Training Admin - A user that can see training compliance in the training matrix for people in the team. They can not manage people in/out of the team.
Procedure Collaborators - An admin user who can edit the procedure in question, as well as invite others to collaborate on the tasks within.
When creating a new procedure, you automatically become a procedure collaborator - meaning you will also automatically have access to your procedure within the Zaptic App.
Company tab:
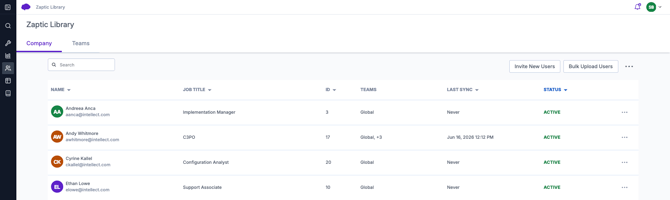
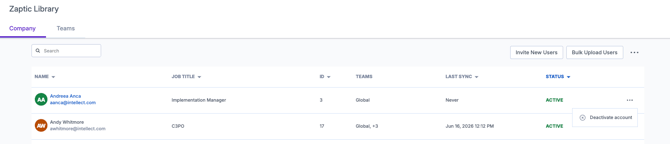
This page contains all the users invited to your Zaptic instance. At a high level you can see:
- The user's name and email address - As per their profile in the app
- Note: Users can not update their own emails. For email updates, please reach out to support@zaptic.com
- The user's job title - User created via the app
- The user ID - This is given automatically by Zaptic and can't be updated
- The users team(s) - As per their profile
- When the user last synced (App Only)
- As Zaptic has offline functionality, it is possible the user has interacted with the app since the last sync date in an area with no connection i.e. offline mode.
- The user's status - Active (account created) Invited (No account created yet)
User Profile:
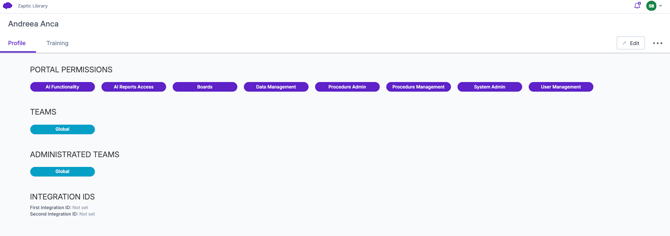
Click on a specific user, to reach the user profile.
If you are a team admin of at least one of the team's the user belongs to, the edit button will appear and you can update's profile.
Click "Edit" to update teams/permissions and make a user a Team Admin:
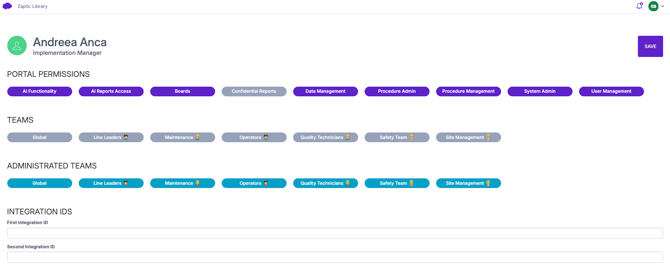
You can deactivate a user either from the 3 dots on the individual user profile or from the 3 dots alongside the user in the company tab.
Teams Tab:
Here you can review, add and manage teams in Zaptic.
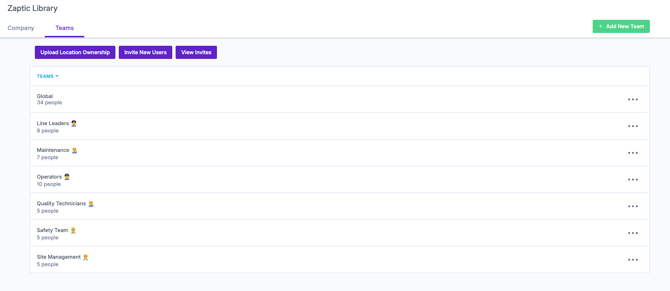
- Click on the Add New Team button in the right to create a new team.
- Give your team a name and press Save

- By default, you will be a team admin as you created the team, as well as a member
- Use the + Add Users to team button to add additional users
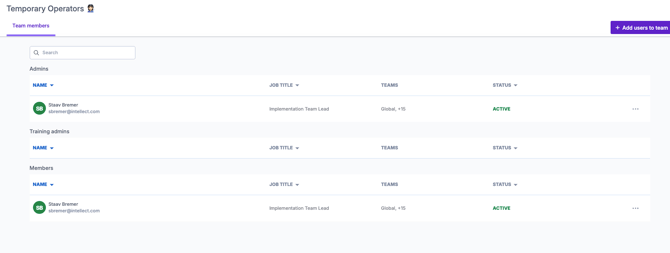
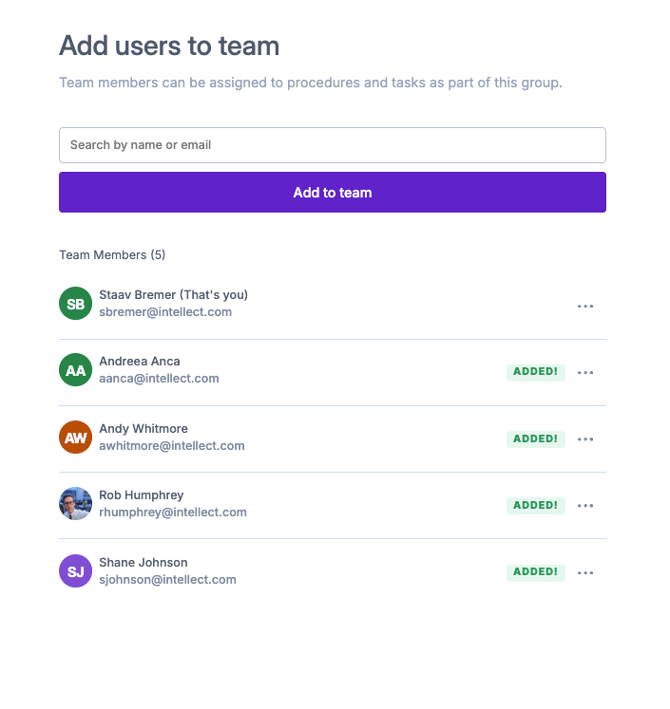
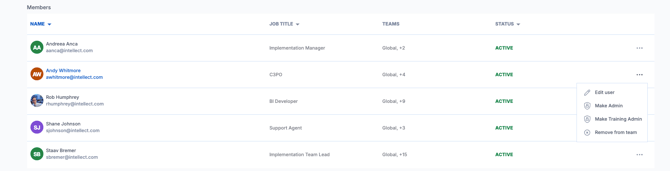
- Manage the users in this team by clicking the 3 dots to the right of any user
- Edit the user from their profile
- Make Team Admin
- Make Training Admin
- Remove from Team
Inviting Users
Manual User Invites
This method should be used when inviting few users, with similar permissions/teams. This method should not be used for creating accounts for users with no company email.
-
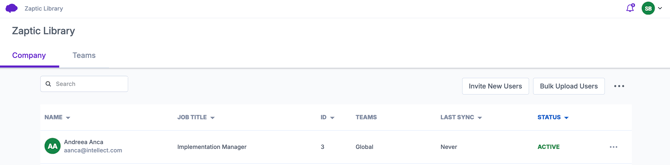
From the Company tab, click on "Invite New Users"
-
Once the invite modal opens, begin by adding emails into the box.
-
Multiple emails can be added as long as the permissions and team(s) remain the same. When any of these differ, they must be placed in a separate invite.
-
Emails can be copied and pasted directly from a list.
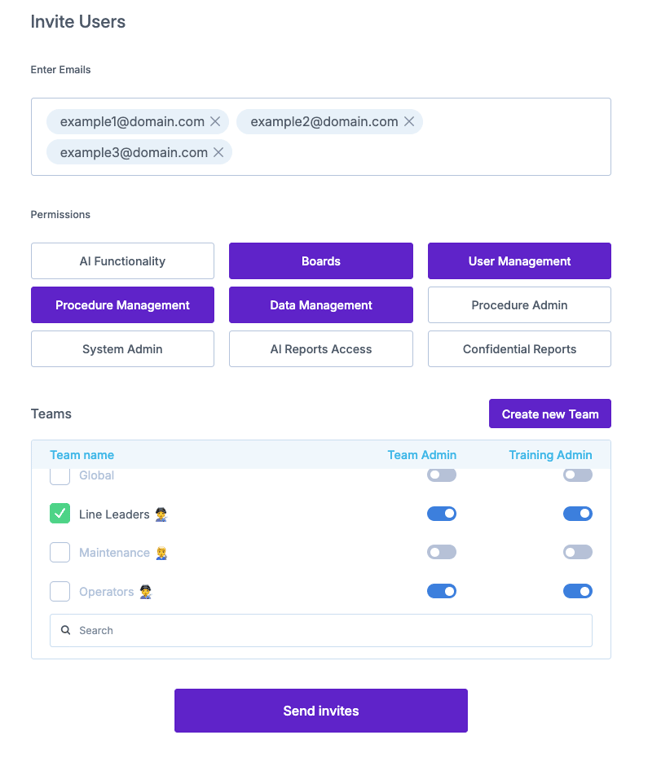
- Select the permissions relevant for the new user(s)
- Select at least one team to which the user(s) is assigned
- Note: The "User Management" permission will show an additional option to make the user(s) a team admin. Team admins are able to manage the people within said team.
There are no app permissions in Zaptic - every user has access to the app by default!
Bulk User Invites
Using a CSV, users can be invited to Zaptic in bulk with different permissions and team memberships to quicken the process. It is important that before inviting users in bulk, you have created the required teams.
-
From the company tab, click on "Bulk Upload Users"
- Use the download file option to generate a template that is specific to the Zaptic instance you are working in and it's teams.
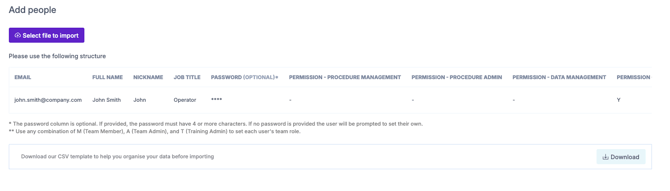
- Populate your file with the required fields of information including:
- Email
- Note: It is here that you can create "Fake Emails" for users who do not have company emails. Simply make up an email that takes the regular email format of name@domain.com. If you are authenticating with Single Sign On (SSO) please ensure the domain used in your fake email is not the same as the business one with which accounts authenticate.
- Full Name - First and Last
- Nickname - Recommend repeating full name information
- Job Title - Set once during set up but can then be updated by the user in the app
- Password (Optional) - This must be used for Fake Email accounts and must have more than 4 characters.
- Permissions
- Place a "Y" in the cell to grant a permission
- Place a "-" in the cell to not grant a permission
- Team membership
- Use any combination of
- M (Team Member)
- A (Team Admin)
- T (Training Admin)
- Use any combination of
- Email
Download User Training
Directly from the teams tab, a user specific training matrix can be downloaded.
- Click on the 3 dots in the top right corer
- Download User Training
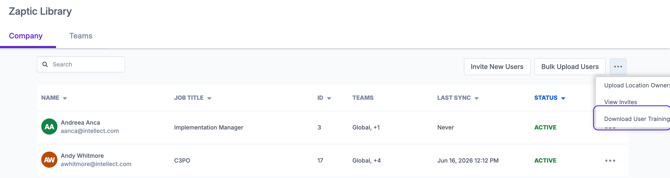
This can be used to do your own analysis on the training data.
Permissions
The table below details the user permissions available in Zaptic.
| Permission | Access/Functionality |
| Boards | The boards tab in the portal, including all boards present within. |
| Data Management | Data management tab and the ability to create and update unit types and units. |
| Procedure Management | Procedures and Guides tabs and the ability to create a new procedure and the tasks and training within it as well as a view only permission to the rest of the procedures on the instance. |
| Procedure Admin | Like Procedure Management but with the addition of automatic collaboration on ALL procedures giving full edit access to all tasks and trainings in the instance. |
| User management |
Teams tab and the ability to view existing users and teams. As well as setting/updating of user properties. Note: Users with user management permission who are also team admins can add / remove users from the teams they admin. |
| System Admin* | Admin privileges; gives access to all the above combined, as well as team administrator privileges to all teams. Only system admins can create and edit user properties. |
| Confidential Reports | Only users with the "Super User" permission can enable this and it is required to see confidential reports, mark/unmark reports as being confidential. |
| Restricted User | This permission ensures that within the App, the user will only have access to the Tasks, Trainings, Guides and Reports from the procedures to which their teams are assigned. |
| AI Functionality | Allows you to control AI features on a user level. Anyone with a Super User access can grant this permission. When this permission is enabled, AI related features will be accessible in the portal. On it's own, this will give the user access to query Zaptic's Guides in search for knowledge. |
| AI Reports Access | Users with this additional AI permission will not only be able to query the Guides database but also the reports created by their very own colleagues and site personnel. Within AIKA, the source from which the information came i.e. Report or Guide is clearly written. |
User Properties
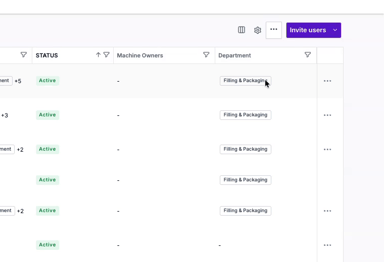
User properties let you add extra information to users that is specific to your organisation, such as the department each person works in. Each property becomes a new column in the Users tab, so you can sort and filter users by it.
Properties come in two kinds:
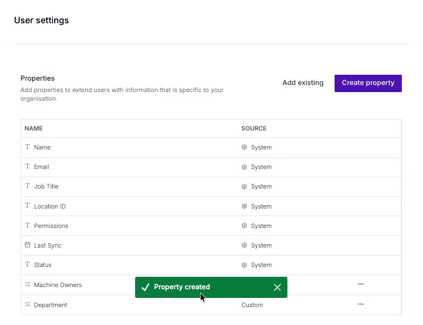
- System properties are built in and cannot be changed: Name, Email, Job Title, Location ID, Permissions, Last Sync and Status.
- Custom properties are the ones you create, for example Machine Owners or Department.
If you want users to pick from a fixed list (for example a list of departments), create that list as a unit type in Data Management first. It can then be used as a Unit property.
Only users with System Admin permission can create user properties.
Only users with User Management permission can set or update user property values.
Creating a user property
This example creates a Department property that lets you pick from a list of departments.
- From the Users tab, click the settings (cog) icon to the left of the Invite users button.
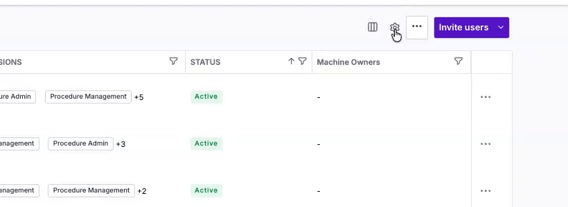
- On the User settings page, click Create property. To reuse a property that already exists, click Add existing instead.
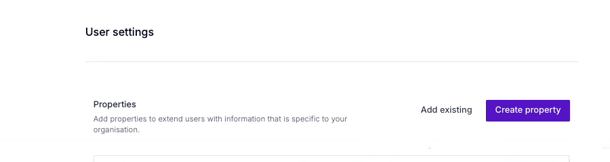
- In the Create new property window, fill in the fields:
- Type - choose Unit to pick values from a list held in Data Management. Choose Text for free text.
- Unit type - select the list to use, for example Department.
- Name - enter the name that will appear as the column header, for example Department.
- Allow multiple selection - turn this on if a user can have more than one value (for example, works across two departments).
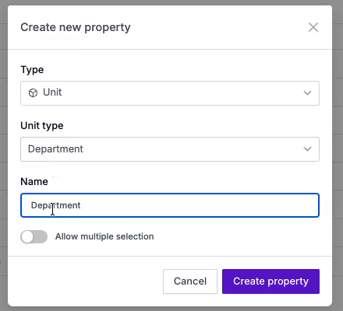
- Click Create property. A Property created message appears and the new property is listed with the source Custom.
Assigning a property to users
Once created, the property appears as a new column in the Users tab. You can fill it in for several users at once.
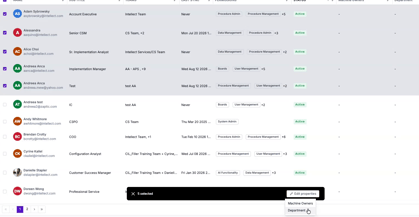
- Go back to the Users tab and tick the checkbox next to each user you want to update.
- In the bar at the bottom of the page (X selected), click Edit properties and choose the property, for example Department.
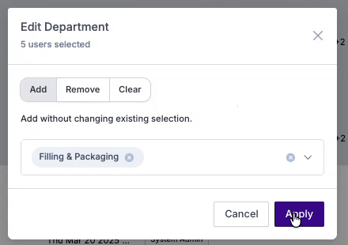
- In the Edit Department window, choose how to apply the change:
- Add - adds the value without changing the user's existing selection.
- Remove - removes the value from the selected users.
- Clear - clears the property for the selected users.
- Select the value (for example Filling & Packaging) and click Apply.
- The value now shows in the Department column for every selected user. Use the filter icon in the column header to view users by department.