
Video released on 30/08/2024
Why use data attribute routing?
Unit data attribute routing is how the software decides where to send user's based on specific units and the values attached to them. Using master data, flows can be built to compare a user entered value with a desired range, target or upper/lower limit value (e.g. for centerlines, quality checks...) and create tailor-made paths and next steps based on the comparison between actual and attributed values.
What is a data attribute?
To see or create data attributes, first go to the Data Management tab in the Zaptic Portal and select a Unit Type.
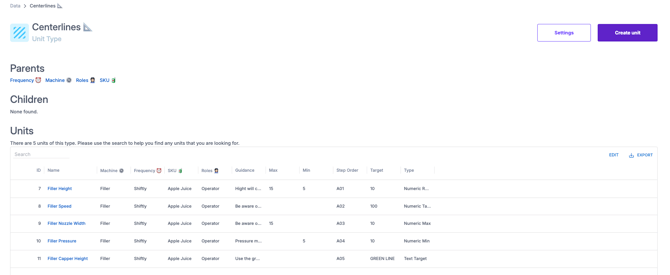
The unit data attribute and unique IDs can be seen at a high level within the table. If you select any individual unit, you can view these more clearly alongside other relevant information such as when the last edits were made to this unit in the audit trail and it's parent/child relationships.
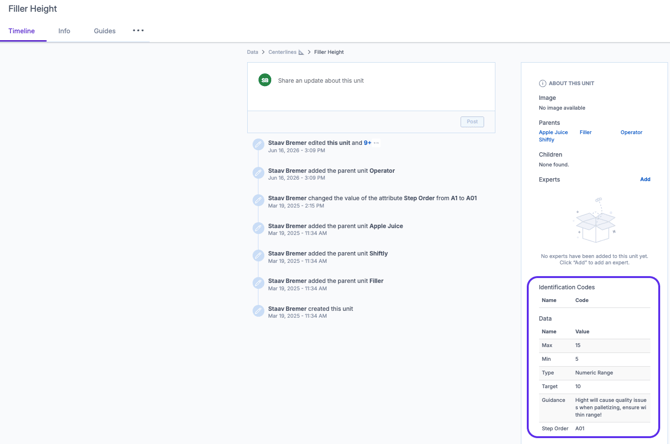
Note: The information and feature set in this article regarding both routing and visualisation of information is only applicable for "Data" and not for the "Identification Codes".
Identification codes can be used to pair information with other internal systems by assigning an additional ID.
For more information on creating and maintaining unit data attributes, please refer to the Data Management article.
Using Unit Data Attributes in a basic flow
Display
To display any unit data attribute related to your flow/content loop subject you should use the "Text Content" element.
Once you've added the element, search through all available unit data attributes using the # (hashtag) key.
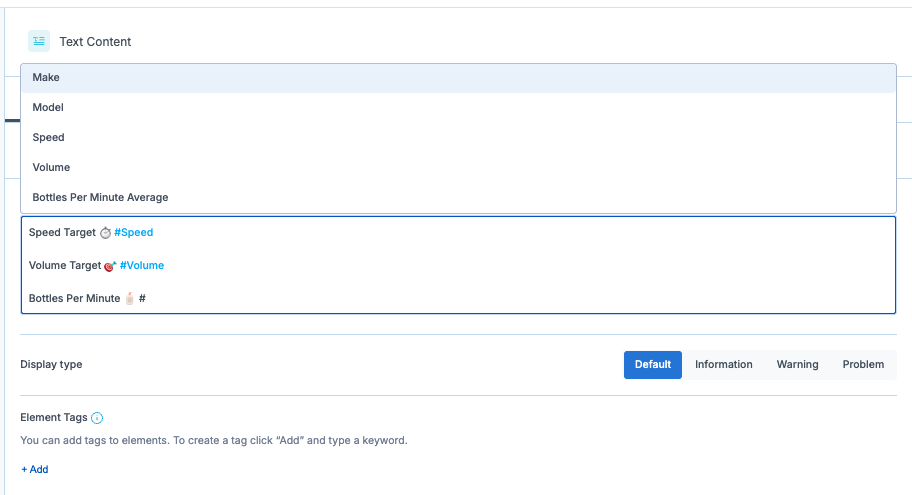
Upon typing the # symbol, Zaptic will display a list of Data Attributes you will be able to call in the flow.
The Data Attributes available in the list will be limited dependent on your workflow subject(s) or content loop subject. Note that if a flow has multiple subjects it's routing or data attributes can display from any of the subjects and it will depend on the unit type of the selection made by the user upon execution as to which is shown.
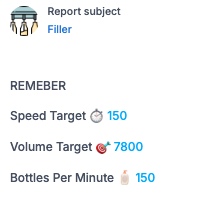
Unit data attributes can make a single workflow dynamic. Within execution in the app, these dynamic unit values which depend on the unit subject or the unit of the content loop, will appear in blue.
Routing
To create routing within the flow based on the above unit data attributes, add a number element. The unit element could ask the user to measure and enter the machine speed.
Remember this is generic for all machines, the machine will be selected upon execution of the task.
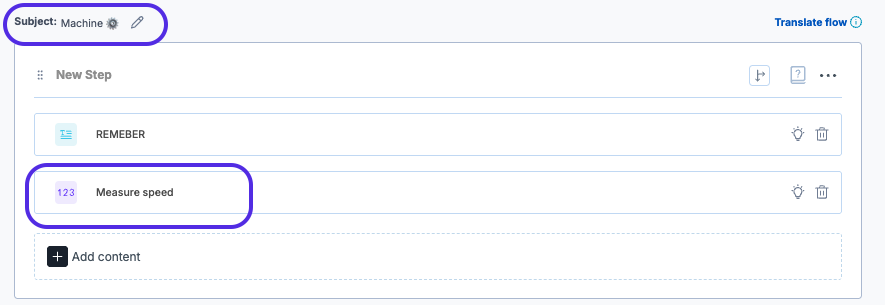
Create routing using the routing arrow so that when the answer to "Measure Speed" is not equal to the Speed unit data attribute, the user is taken to the "Speed not on target" step.
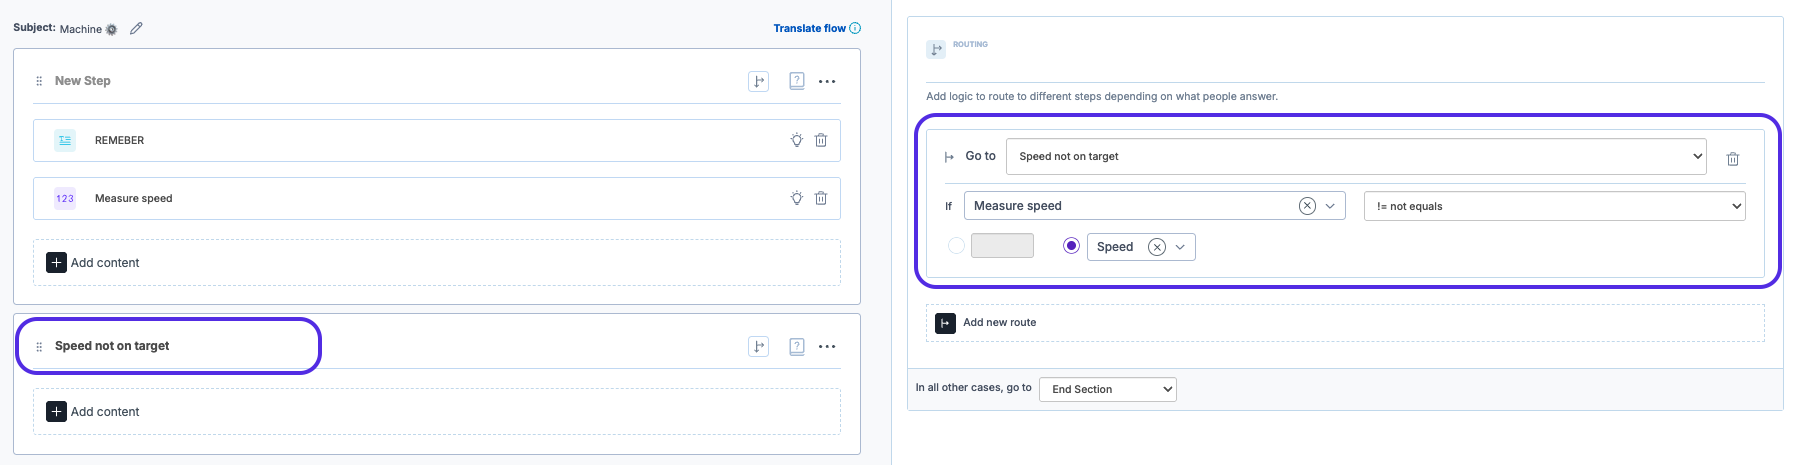
You can continue to build your check each time adding a number capture for the user entered value and routing to an out of limits step if the value is not equal to the target. You can use any basic mathematic operation within your routing.
Note: If this is the end of your task, use the "In all other cases, go to "End Section"" option.
Using Unit Data Attributes in an Advanced Content Loop
Within a content loop, unit data attributes can also be visualised and used to create routing, this time based on the content loop subject.
Example 1 - Filtering Content Loop by Unit Data Attribute
Tasks that happen at a regular cadence, will use the Zaptic scheduler. In order to differentiate which of these tasks should be shown at the given frequency the entire content loop can be filtered based on a data attribute.
For example, a shiftly centerline task could be built using the below configuration.
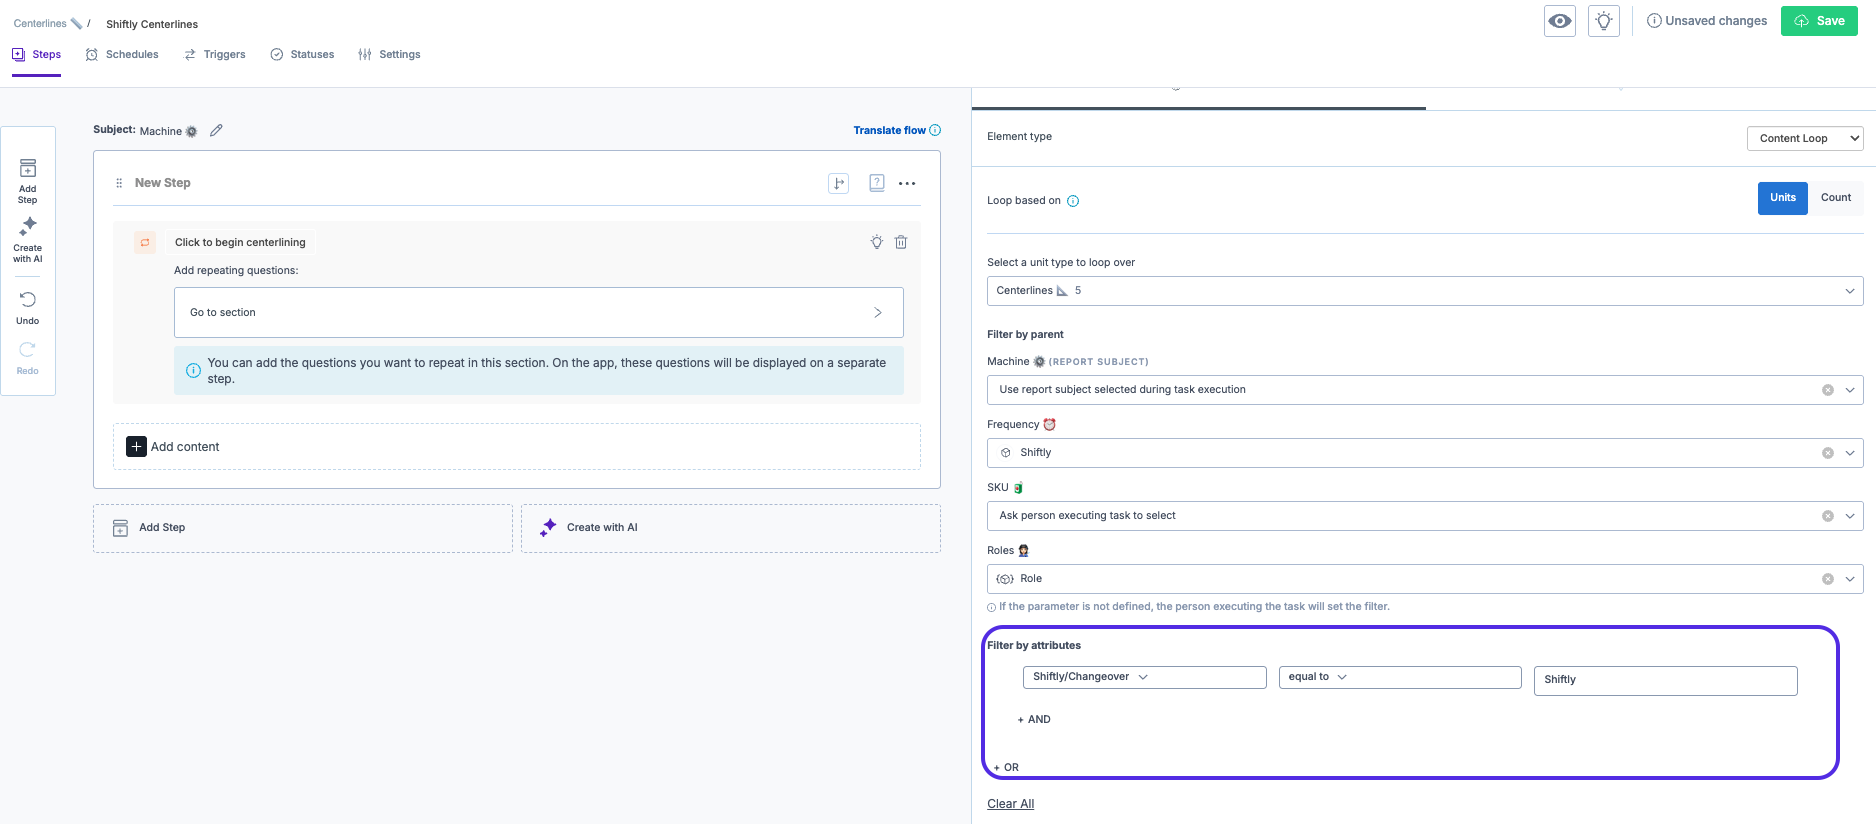
Unit data attribute filters use And/Or Boolean logic meaning that your content loop filtering can be anything from inexistant to fairly advanced.
Example 2- Step Routing with a Unit Data Attribute
To create steps which are unique for based on whether they measure a value against a target or a range, step routing can be added at the beginning of the content loop configuration.
Add a blank step at the very top. This step will not be visible, it will only be used for routing.
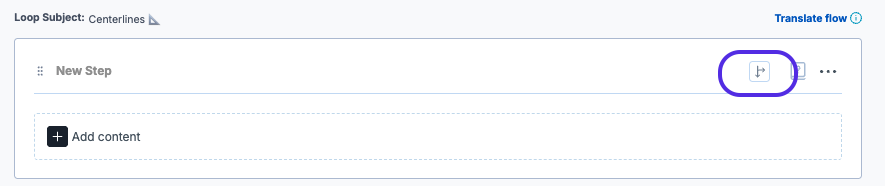
Create steps following this blank step to represent the different operations you will require.
For example, a Numeric Target step will display only a single value and use the "Not Equal To" operation.
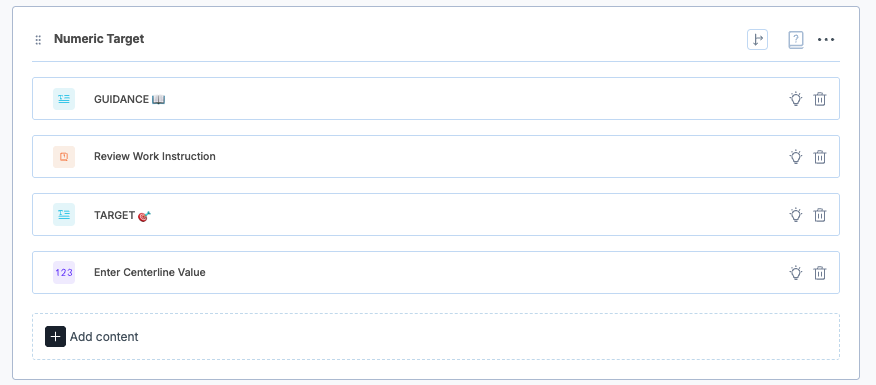
Whereas, a Numeric Range step will display a Min, Target and Max value and use the "Less than" and "Greater than" operations.
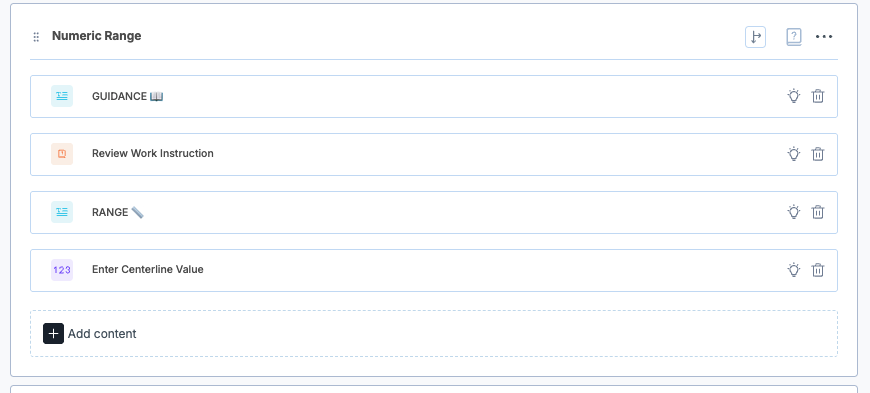
The first blank step, uses the unit data attributes to ensure the right checks are performed for the right units based on their "Type" unit data attribute. Below is an example of how this routing is created in Step one.
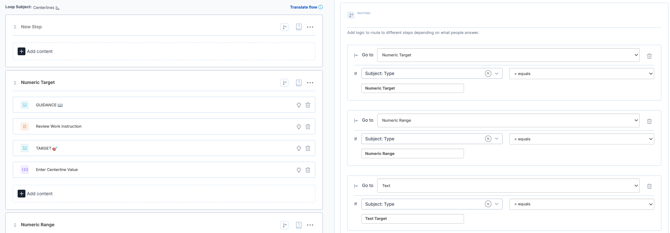
Note: You should have the same number of routes as you do types in data management.
Once you have created routing to the correct step type, each of the steps will also require unit data attribute routing (as per the basic example above) based on the content loop subject.
Below is an example of how to create greater than < or less than > routing for a step with numeric range values.

Top Tip: Build one step and it's routing, turn it into a step template and then reuse updating only the necessary parts each time.
For more information on step templates, head to Task Configuration and Flow Steps II
Using Unit Data Attributes in an Advanced Schedule
For schedules to be based on conditions, unit data attributes are used, allowing states to be reflected in Zaptic and therefore decide on whether on not a schedule should run.
An example could be a gauge monitoring check which should only be scheduled if the machine is running.
As long as there is a column in the Machine data management unit type representing the machine state, this is possible using the attribute against the schedule.
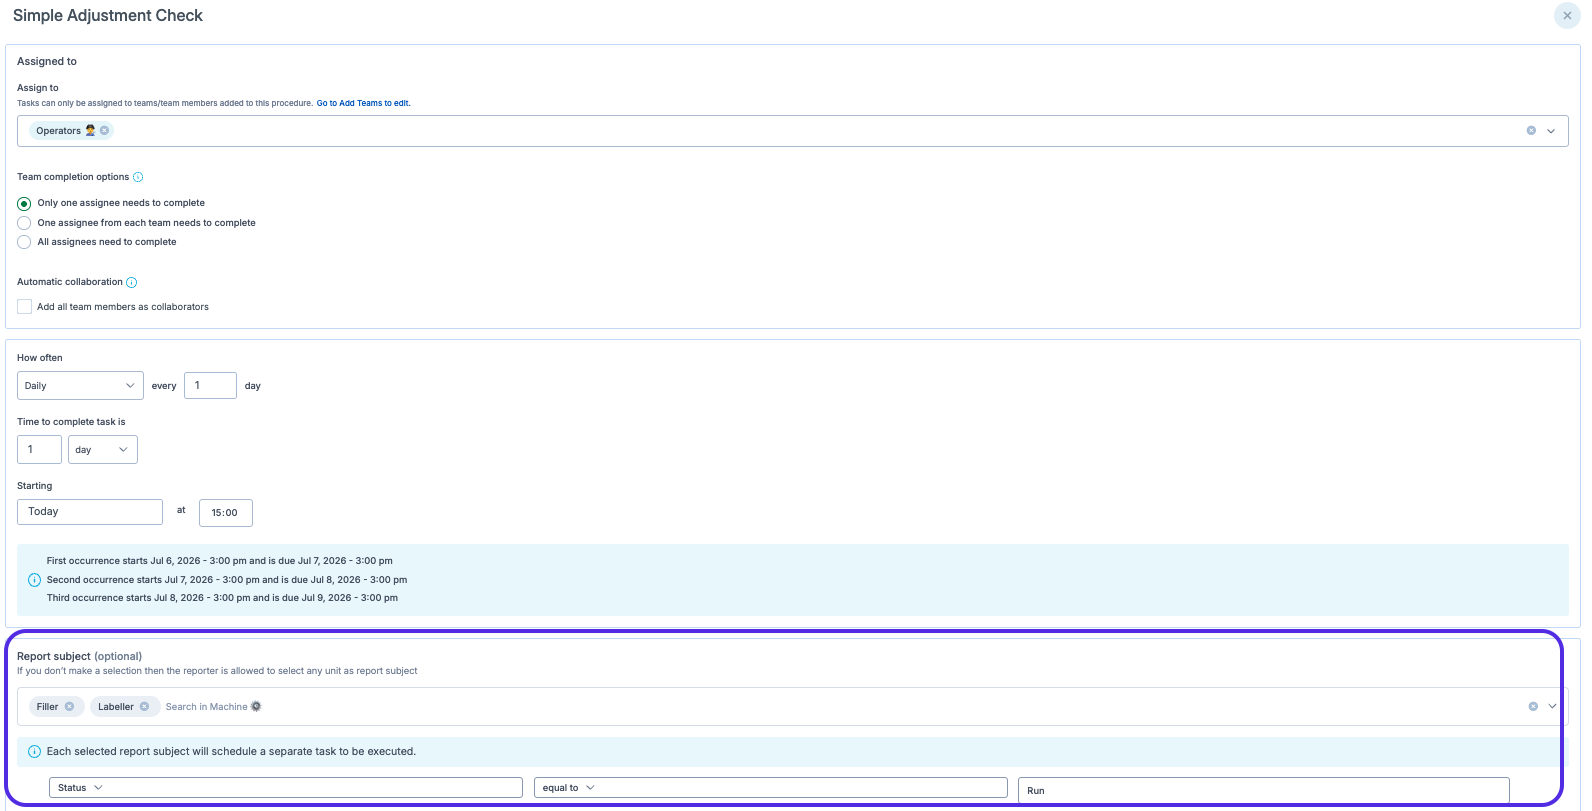
Examples can be more complex using numbers and counts to trigger schedules if machines fall below a certain speed, if SKU count is greater than X etc.
Note: Some of the above examples are better handled alongside integrations so that this unit data attribute value doesn't have to be manually maintained.